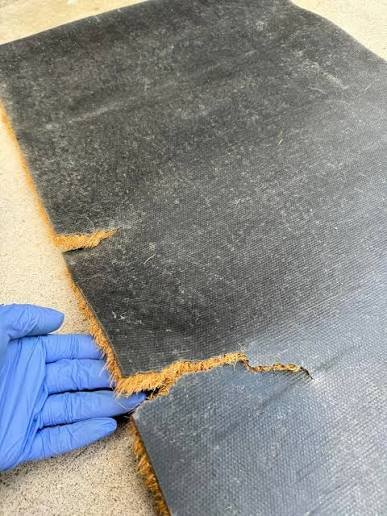
We’ve all been there. You buy a beautiful, traditional hand-woven coir mat (or coir ka gaddha as many of us fondly call it) to give your home entrance that warm, rustic, and inviting vibe. It looks absolutely perfect outside your main door. But fast forward a few months through heavy monsoon mud, festive family gatherings, and everyday foot traffic, and suddenly, things start looking a bit messy. So, How to fix a fraying coir mat ?
Those neat, tightly woven borders begin to look like a bad hair day. Little coconut fibers start escaping, and before you know it, the edges are actively unraveling. It is incredibly frustrating to watch a premium, eco-friendly mat fall apart when the middle of it is still perfectly tough and functional.
If you are currently staring at a shedding, messy doormat and wondering if it’s time to throw it in the bin—hold that thought! You don’t need to spend money on a brand-new one just yet. Coir is one of the most resilient natural fibers on the planet, and with a little bit of DIY love, you can easily restore it.
In this comprehensive guide, we will walk you through exactly how to fix a fraying coir mat and extend its lifespan by years. Grab a cup of chai, and let’s get your doorstep looking sharp again!
Why Do Coir Mat Edges Fray?
Before we jump into the actual tools and repairs, let’s look at the “why” behind the mess. Understanding what causes an unraveling doormat edge will help you prevent it from happening again after you fix it.
Coir mats are made from the fibrous husks of coconuts. It’s an incredible, sustainable material that excels at scraping off stubborn Indian street dust, dried mud, and grime from our footwear. However, because it is a natural, coarse material, it lacks the infinite flexibility of synthetic plastics like nylon or polyester.
Here are the main culprits behind the fraying:
- High-Impact Friction Points: The perimeter of your mat takes a beating. When people wipe their feet, they naturally apply downward and outward pressure right at the edges. This constant twisting motion loosens the outermost weave.
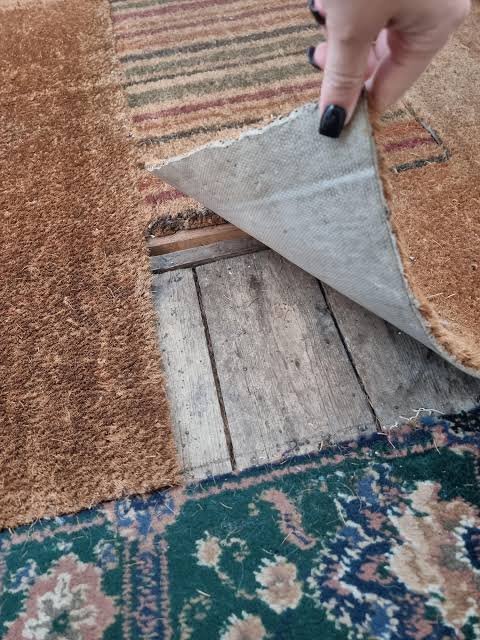
- Lack of a Rubber Backing: While modern coir mats often come with a heavy PVC or rubber backing that locks the fibers in place, traditional, premium hand-woven mats are often unbacked. Without a solid rubber base holding the perimeter, the structural warping threads are much more vulnerable to slipping out.
- Environmental Stress: In India, our door mats face extreme weather conditions. One month it’s scorching 40°C heat drying out the fibers, and the next, it’s torrential monsoon rain soaking them through. This constant wetting and drying cycle makes the natural fibers brittle and prone to breaking.
- The “Catching” Effect: Have you ever accidentally caught the edge of your mat with the bottom of a heavy boot, a grocery bag, or the wheels of a delivery trolley? That single snag can pull a vital tension thread loose, initiating a slow, painful unraveling process.
The Step-by-Step Restoration Method
Restoring a coconut fiber door mat doesn’t require any fancy carpentry skills or expensive industrial tools. In fact, you most likely already have most of the required items sitting in your storage room or local hardware shop.
Tools and Materials Needed:
- A pair of sharp heavy-duty scissors or a utility knife
- Heavy-duty fabric glue for coir (like Fevicryl Fabric Glue, E6000, or a standard hot glue gun with extra glue sticks)
- Thick jute twine, coir cord, or heavy-duty outdoor carpet tape
- A stiff-bristled brush or an old comb
- A heavy book or a brick (for weighing things down)
Let’s dive into the simple 3-step coir doormat restoration process.
Step 1: Trimming the Loose Warping Threads
The very first rule of fixing any fraying textile is to clean up the workspace. If you try to apply glue directly over a chaotic web of tangled fibers, you will end up with an ugly, bumpy mess that won’t hold up for long.
[Unraveling Mat Edges] ➔ [Comb out loose fibers] ➔ [Trim cleanly with scissors]
- Brush out the loose stuff: Take your mat outside and give it a vigorous shake to remove trapped dust and loose dirt. Use an old stiff brush to gently comb through the fraying area. This will pull out the fibers that are already completely detached and just hanging on by a thread.
- Locate the structural warp: Look closely at the edge. Identify the main horizontal and vertical threads (the warp and the weft) that keep the mat woven together.
- Trim cleanly: Take your sharp scissors and carefully snip away the loose, dangling, fuzzy fibers. Be careful not to cut into the intact, tightly woven body of the mat. Your goal here is to create a clean, uniform edge so that your adhesive can bond directly to the stable core of the mat.
Step 2: Applying Heavy-Duty Fabric Glue or Hot Glue
Now that your mat has a clean edge, it is time to seal it up. Think of this step as applying a protective weld to the fabric. We need an adhesive that can seep into the coarse coconut fibers and lock them in place permanently.
Pro Tip: If your mat lives entirely outdoors and gets rained on regularly, choose a waterproof heavy-duty fabric glue for coir over hot glue. Hot glue is great for covered apartment hallways but can become brittle under extreme outdoor heat and moisture.
- Prep the glue: If you are using a hot glue gun, let it heat up fully so the glue flows like liquid. If you are using a liquid fabric glue, ensure the nozzle is clean.
- Inject the adhesive: Carefully run a generous bead of glue directly along the raw, trimmed edge of the coir mat. Don’t be shy with the quantity; coir is highly porous and will drink up the adhesive. Use the tip of your glue gun or a scrap piece of cardboard to press the glue deep into the exposed fiber ends.
- Clamp and Set: While the glue is still tacky, press the loose ends firmly together. Place a sheet of wax paper or plastic wrap over the glued edge (so it doesn’t stick to your house), and weigh it down with a heavy brick or a couple of old textbooks. Leave it to cure completely for at least 2 to 3 hours.
Step 3: Binding with Twine or Carpet Tape
If the fraying on your mat was severe, glue alone might not cut it. To truly ensure a permanent repair for your coconut fiber door mat, you need to bind the edge. You have two excellent options here depending on the look you prefer:
Option A: The Traditional Jute/Coir Twine Binding (Best for Unbacked Mats)
If you love the rustic, all-natural look of your hand-woven mat, you can bind the edge using thick jute twine.
- Thread a thick upholstery needle with heavy-duty jute twine.
- Tie a secure knot at one end of the damaged section.
- Loop the twine over and around the raw edge in a tight, continuous spiral (blanket stitch or overcast stitch).
- Ensure each loop is pulled tight against the glued edge. Once you reach the end, tie it off securely and add a drop of glue to the final knot. This creates an incredibly tough, braided border that completely stops future unravelling.
Option B: The Carpet Tape Binding (Best for Quick, Hidden Repairs)
If you want a fast, no-sew solution, heavy-duty outdoor carpet tape is your best friend.
- Cut a strip of waterproof outdoor carpet tape or gorilla tape that matches the length of the damaged edge.
- Align the tape so that half of its width covers the top border of the mat, and fold the remaining half tightly over the edge onto the bottom of the mat.
- Press down with significant force to ensure the adhesive bites deep into the textured coir. This encapsulates the raw edges completely, hiding the fray away from sight.
How to Prevent Future Fraying
Congratulations! Your mat is officially saved from the landfill. However, to make sure you don’t have to repeat this entire process next month, let’s implement a few smart placement adjustments and maintenance habits to prevent coir mat shedding in the long run.
- Mind the Threshold: Position your mat so that the edges do not constantly catch on the bottom of your heavy main door when it opens and closes. Constant scraping from the door itself is the number one secret killer of coir mats.
- Keep it Under a Covered Area: While coir handles dirt beautifully, it hates being waterlogged. If possible, keep your unbacked coir mat in a covered verandah, balcony, or apartment hallway where it is sheltered from direct rain and harsh, direct afternoon sunlight.
- Rotate the Mat Monthly: We are creatures of habit—we tend to step on the exact same spot every time we enter the house. Every few weeks, spin your mat 180 degrees. This distributes the high-impact friction evenly across all sides, preventing a single edge from breaking down prematurely.
- Gentle Cleaning Only: Never ever throw a coir mat into a washing machine or beat it brutally against a wall. To clean it safely, simply turn it upside down and give it a firm tap to drop the trapped sand out, or use a vacuum cleaner with the upholstery brush attachment.
Summary & FAQ Section
Summary Table: Coir Mat Repair Quick Guide
| Step | Action | Tools Needed | Expected Time |
| 1. Trim | Clean up loose, unraveling fibers and comb out debris. | Scissors, stiff brush | 5 Mins |
| 2. Seal | Apply a thick bead of heavy-duty waterproof glue to lock ends. | Fabric glue or Hot glue gun | 10 Mins (Plus drying) |
| 3. Bind | Wrap with jute twine or seal with outdoor carpet tape. | Twine, needle, or tape | 15 Mins |
Frequently Asked Questions (FAQs)
Q1: Can I wash my coir mat with a hose to clean it after repairing?
It is highly recommended to avoid soaking an unbacked coir mat. Excessive water softens the natural fibers and weakens any glue you applied during restoration. Stick to dry shaking, light brushing, or vacuuming. If it gets muddy, let the mud dry completely first, then scrape it off with a stiff brush.
Q2: Is hot glue better or fabric glue for fixing a fraying coir mat?
Both work well, but it depends on where the mat lives. Hot glue is incredibly fast and sets in seconds, making it perfect for indoor or covered apartment door mats. However, if your mat is exposed to open Indian summer heat and monsoon rain, a specialized waterproof heavy-duty fabric glue for coir provides a much more flexible and durable hold.
Q3: How often should I replace a coir doormat?
A standard, unbacked coir mat typically lasts about 1 to 2 years under normal conditions. However, if you apply the quick DIY fixes and preventative measures outlined in this guide, you can easily extend its life to 3 or 4 years!
Q4: Why is my new coir mat shedding so much right out of the box?
Don’t worry, a little bit of shedding is completely normal for brand-new durable outdoor mats made from coconut fiber. This is just excess material from the manufacturing process clearing out. Give it a good shake outside before placing it down; the shedding should naturally subside within two to three weeks of regular use.
See Also
How To Fix Frayed Carpet Edges
How to Clean Mold and Mildew from a Coir Door Mat Without Ruining It